Extended Dynamic Range Is The New HDR
HDR is tacky, garish and it hurts your eyes by just glimpsing at it.
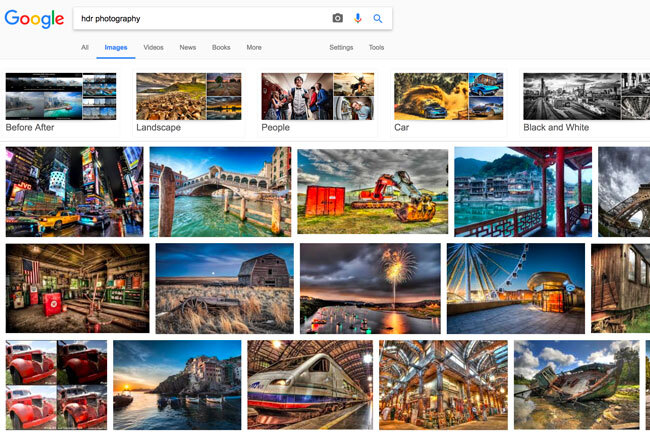
You’ve also probably seen plenty of these examples on Google Images. If you haven’t, go ahead, search “HDR photography” and check out the images.
Pretty horrible, right?
HDR has always had a bad reputation because of the way the images are processed. Some of us like the effect so much that they often go overboard with tone-mapping in HDR software. This often results in images that seem to defy the physics law of light.
Some photographers tend to lean more towards the surreal effect of HDR. You might argue that art is personal and subjective. I’m definitely not disputing that. If that is what you’re aiming for, by all means, go for it.
For the rest of you, I hope to change your perception on HDR photography and introduce you to the idea of extended dynamic range by the end of this post.
HDR = HDR Software = Badness
When you read or hear about HDR, you think HDR software.
It’s unfortunate that these two are linked together so tightly. This because HDR images traditionally require HDR software to create them.
But high dynamic range is not new, at all.
Back in the days of our pioneers, they already realized the limitation of camera’s dynamic range. One of the earliest technique to create an HDR image in the darkroom is called the Water Bath Development. However, this technique only works in black and white images. One of the better-known photographers - Ansel Adams used this technique, together with dodging and burning to create his epic work.
Although the process is technical, it was an elegant way of creating HDR images. I think it’s time for us to ditch automation and re-invent HDR once again.
Enter exposure blending.
Exposure Blending Is The New Black
You might wonder:
What is the difference between extended dynamic range and high dynamic range?
The answer is simple.
There is no difference from the technical point of view.
Both describe the dynamic range that is beyond what the digital camera sensor can capture.
For the benefit of our beginner comrades, let me explain what dynamic range is in brief. If you know this already, feel free to skip to the next section.
Dynamic Range
Dynamic range refers to the range of brightness that can be perceived or displayed by a medium or device. Each device has different dynamic range.
The dynamic range our cameras can capture is far lower than the dynamic range the human eye can perceive. This is why your photo of the sunset always have the foreground in good exposure but the sun is overblown.
To overcome this limitation, you need to bracket the exposure. I won’t go into the details of bracketing exposure, but essentially you get a series of images of the exact same scene at a different exposure. Each image captures a part of the whole dynamic range.
Combining Multiple Exposures
Now here comes the fun part.
Instead of using an HDR software to automate the process of combining your images, you’re going to do so manually. This is called exposure blending.
I know this sounds laborious, but I feel exposure blending is the way forward to produce natural and realistic HDR images. The post-processing time does take a bit longer, but your workflow will get better as you blend more.
As they say, practice makes perfect.
Purist versus Pragmatist
There are different opinions on whether an HDR image created by blending exposures is considered a “true HDR”. Sean Bagshaw, the author of several video training courses on exposure blending, called this “extended dynamic range” and he explained why on his blog.
The way I see it, we increase the dynamic range of an image by combining multiple exposures, which is not achievable with a single exposure ordinarily. It’s irrelevant if this is a “true” HDR or not. We have reached our goal.
However, the term “extended dynamic range” does sound better than “high dynamic range” now because the former has not (yet) been tainted. Until someone ruins it, maybe we should just call it this way.
The Monotonous Workflow
I have to confess that I am a convert of exposure blending from HDR software.
Several years ago, I rely heavily on HDR software. I was happy until I started to notice the irritating image noise, particularly in the blue sky. I never liked the surreal look and have always tried to keep my images as natural as possible.
I also started to feel limited by the options I have to post-process my images in HDR software. It didn’t take long until the hype of HDR died down. Once I hit the plateau, everything felt mundane, boring and flat. There was no fun in photography anymore.
“There must be more that this” was exactly what I told myself. While contemplating what is left in my passion for photography, I searched the internet for an answer, knowing that I’ll probably not find anything useful and wasting my time away.
I couldn’t remember what terms I used to search, but I found an article full of cityscape images that was mind-blowing. There was a link that led me to a couple of articles and eventually to Tony Kuyper’s website. That was my moment when I learned about luminosity mask.
And the rest is history.
Exposure Blending Workflow
Here are three reasons why I think exposure blending is better than HDR software for creating HDR images (or should I say XDR? - eXtended Dynamic Range)
-
The results are often more natural and closer to what we perceived.
-
More flexibility in creative editing.
-
Post-processing steps are different in every image and this keeps things interesting. (also means you’re less likely to fall asleep editing your image)
You should bear in mind that you need an image editing software that supports layer masking. Adobe Photoshop (paid) and GIMP (free) are the industrial standards.
With that said, let me share my blending workflow with an example. My typical post-processing workflow looks like this:
Step 1: Preparing Raw Files
After deciding the images I’m going to blend in Lightroom, the first thing I do is cleaning up. This involves checking the box for “Correct Lens Profile” and “Remove Chromatic Aberration”. I also clone stamp any sensor dusts that are sore to the eyes.
Then, I check the histogram for each image for any highlights or shadows clipping and recover them with the Highlights and Shadows slider adjustment. That is all I do at this stage.
Step 2: Blending Multiple Exposures
I select all the images I want in Lightroom and open them up in Photoshop as layers. You can do so by right click and choose “Open In Photoshop As Layers”. If you bracket the exposure handheld, I highly recommend you to align the layers first.
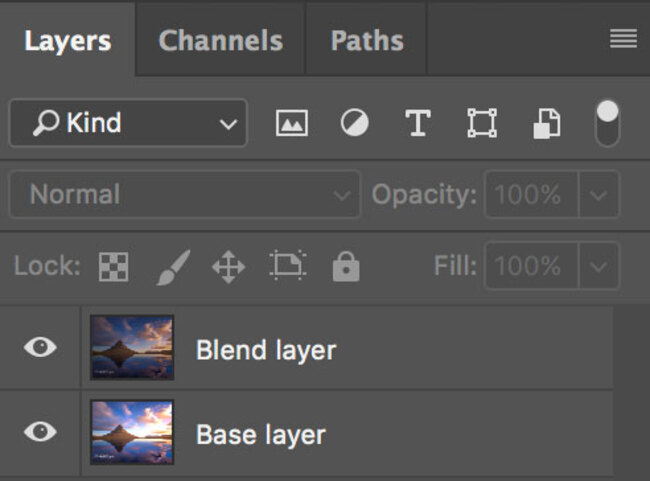
I tend to place the brighter exposure below and the darker one on top. In the example here, I have two bracketed exposures of a mountain at sunrise. One image is exposed for the foreground (brighter) and one for the sky (darker). I place the brighter image below (first layer) with the darker on top (second layer) and add a black layer mask to the second layer.
What happens next is variable, depending on the complexity of the image. I use which ever way that is the simplest and the quickest to blend. In most cases, I found myself using luminosity mask because it is just an incredibly efficient selection tool.
By combining multiple exposures, you have formally created an image with an extended dynamic range.
Step 3: Further Post-Processing
The exposure blending workflow doesn’t stop here. What you’ve done so far is merely the beginning.
Your baby image needs plenty of love to grow.
There is no rules or steps to follow in image post-processing. Every image is unique and has its own needs. But what I can recommend is to have a vision and work towards it.
This means an idea of what you want your image to look in the end. It is not always easy but it does help to guide and save you from wandering around aimlessly in Photoshop.
If you haven’t got a clue how your image can potentially be transformed into, visit a photography community such as 500px for inspiration.
I often start off by applying tonal and color adjustment to add life to the image. Depending on the scene, I use luminosity mask to apply targeted, selective adjustments to different parts and keeping these adjustments subtle to maintain the natural state of the image.
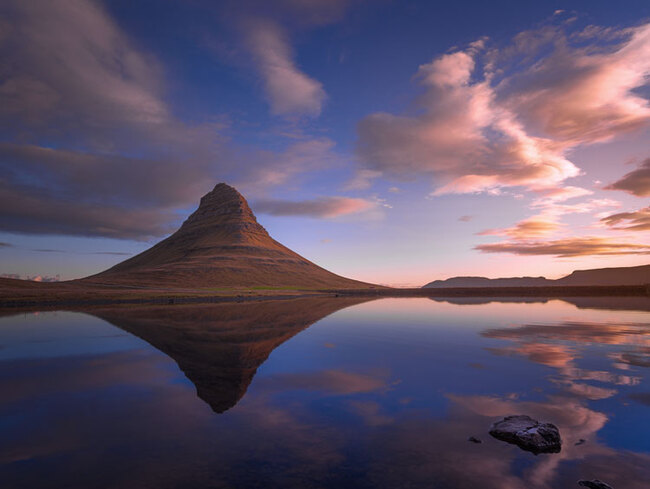
When I’m satisfied with the look, I finish off at this stage by enhancing the details with a high pass filter. This can be done selectively with a luminosity mask or just a simple layer mask. Areas that can be spared from details enhancement are clouds, water or anything that is in motion.
Above: Image was blended from two exposures and post-processed in Photoshop.
(Optional): Stylization
This is optional and I only do it to images that I think has the potential for it.
Stylization is adding effects that accentuate or augment a scene in ways that emphasize a mood and contribute to the style of an image’s final presentation.
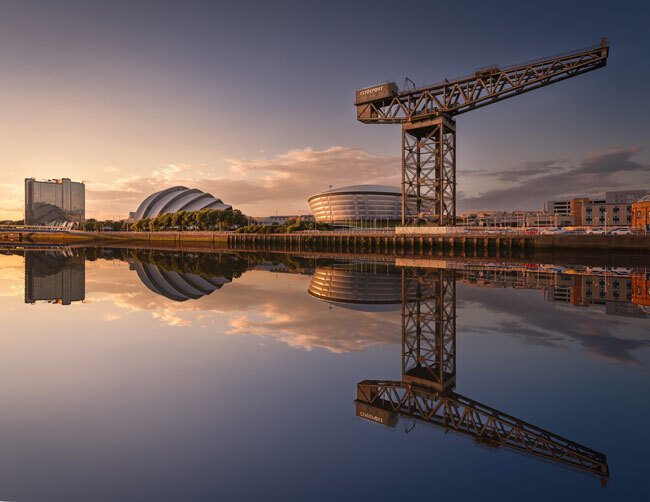
Light bleed, light painting, dodge and burn, Orton effect, etc. are all forms of image stylization. I won’t go into the details here because each technique deserves a separate post.
Above: Image after stylization (dodge and burn, and light bleed) in Photoshop.
Step 4: Fine-Tuning
After all the above, I re-import the image from Photoshop back into Lightroom. This is done by saving the file in Photoshop and Lightroom will create a new copy of the edited file.
I prefer to fine-tune my image in Lightroom because there are fewer adjustments and therefore less distraction. This allows me to focus on what is important - the overall tone, color and exposure.
Another feature in Lightroom that I like is the simplicity. It only takes a click to add gradient or radial filter and paint in local adjustment with the brush tool. I use these to touch up the image to its final form. Just like how a stage performer touches up her makeup before the grand appearance on stage.
Step 5: Review
For me, this step is probably as important as creating the image itself. It allows me to review my image with a fresh mind.
After finishing with fine-tuning, I come back to the same image a day or two later. Often I find it look too saturated, too under-exposed or the effect from stylization is too strong. Sometimes, it can be the other way round where I think the image lacks oomph.
This is the last chance for me to refine my image before publishing it.
Take Home Message
I sincerely hope I’ve given you an insight into an example of exposure blending workflow. This is the way I do it and I appreciate others might do it differently.
If there is one thing I like you to take away from this article, this is it:
HDR is not dead. Exposure blending should be the way forward in creating balanced, natural and inspiring XDR photographs.
In the future posts, I'll talk more in-depth about exposure blending and the tools I use - luminosity mask.
That’s it for now, I hope you've enjoyed this article!
-Yaopey


